
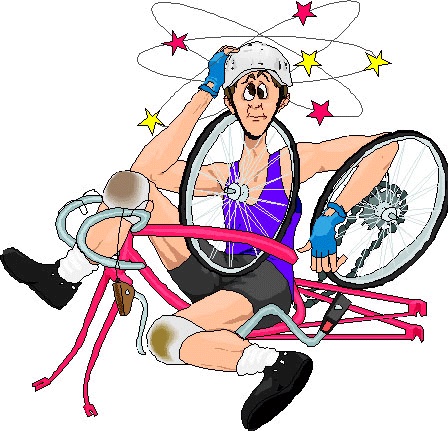
How to Crash
You will crash - learn to crash properly
I’m in the middle of a tight pack of two dozen racers at the Pan-Am Games velodrome, 5 laps from the end of the race, averaging 45kph. There’s a sudden slowing as riders position themselves for the finishing sprint. I hear swearing, and the unmistakable sound of carbon wheels scraping each other as riders make contact at speed. A rider just above me goes down and slides across my rear wheel. My bike bounces and swerves - can I hold it up? No! I’m going down!
Instinctively I take my hand off the bars and reach out to break my fall.
A voice in my head cries: “NO! You idiot! Get your hand back on the bars!”. I comply. “Good it says… elbow and knee in, head up away from the ground - Get ready to absorb the impact”. I obey. I’m down and sliding. “Good!”, the voice says, “Now you can use you hands to guide your slide”. Good idea, as I’m sliding at over 30kph with the track’s inner wall beside me. I eventually slide to a stop and get up unhurt, except for minor road rash. I head off the track to get on my trainer to cool down and shake off the adrenaline coursing through me.
“Wow”, I think to myself, “The ‘how to crash training’ I coach to my athletes really does work!”
Learning How to Crash Might Save You a Lot of Pain
In the previous article from last fall, we talked about how not crash, in this article we’ll discuss how to minimize injury if to do crash. Of course there are no guarantees, but there are techniques you can use to minimize injuries when you crash. There are 3 aspects to minimizing the seriousness of your injuries:
- Fitness: flexibility, joint strength, and balance
- Technique: what to do when falling
- Training: How to learn to follow the right technique
The last point is particularly interesting. Many cycling skills can be practiced, but I don’t recommend you actually get on your bike and repeatedly practice crashing! However we can “simulate” crashing and other emergency situations using mental techniques.
Fitness
Cycling, hiking, skiing, running, gardening, whatever sports or physical activities we do, there is an element of risk of injury. And as we age, we are in a battle against the breakdown of our bodies… bones get brittle, muscles weaken, joints stiffen.
Fitness training will do two things for you:
- It maintains bone and joint strength and flexibility…. This makes you less susceptible to injury when you fall.
- Equally important, it helps maintain a sense of balance and proprioception (your body’s ability to perceive its own position in space). This allows you to recover from getting off balance and to successfully react to incipient falls so you don’t crash at all.
This is why it’s so important to “get in the gym” (figuratively) and regularly do a set of “whole body” exercises for balance, flexibility, and muscle tone. You don’t need to “lift weights” - body weight exercises are fine, and in many cases preferable. Weight machines are bad for our purpose, as they isolate specific muscles, and they don’t recruit the many small muscles used for balance and tone. Yoga, Pilates, and fitness classes that offer a whole body workout, including balance exercises, are great (I’m a fan of the Goodlife BodyFlow and BodyPump classes, for instance). But you can do your own exercises at home, with a minimum of equipment.
Pay extra attention to your upper body and back! We’re already cycling, hiking, and skiing. And it’s the upper body that typically takes the brunt of our falls.
Technique
In cycling and XC skiing, we coach specific techniques for falling to minimize injury (They are similar for both sports). The challenge is we have to “break” (pun intended) our instinctive fall response. The collar bone is most common bone fracture in cycling because people instinctively extend their arms and lock their elbows when falling - this instinct was developed to protect the head when falling while walking/running. But there there are far better ways to protect yourself while cycling (or skiing). Here are the “rules”:
- Keep your hands on the handlebars! - If you do nothing else, remember this. Glue your hands to the bars. Don’t let go. Never, ever let go while crashing!
- Keep your feet on the pedals - Once you are fairly sure you are falling, don’t try to unclip. Focus on protecting your body and head from the fall. Being clipped in can help protect you from serious injury! (But read the article on How not to fall)
- Tuck you head between you arms - Bending you neck forward so your chin is on your chest and your head between your arms is a good way to protect your head, especially if you are crashing “head over heels” because you hit something on the road, or if the direction of your fall is unpredictable. If you know you are falling sideways, keeping your head up and away from the direction of the fall works best, and is a more instinctive response.
- Tuck in your elbows and knees - We want to fall on the side of our legs and arms equally and avoid a single contact point like an elbow, knee, or hip when we hit the ground. This protects our joints, and reduces the force of the impact by absorbing it over a larger area of our body.
OK… now to visualize what’s going on here…. Our hands firmly on the bars, our feet on the pedals, our head tucked in, and our arms & legs “flat” along the bike. The bike is actually acting like a “skeleton” for us! We won’t have a leg or arm fly free where it can get twisted or wrenched, which minimizes the risk of dislocations and muscle/cartilage tears. We won’t absorb the whole impact with an arm, leg, elbow or knee, which minimizes the risk of bone breakages. And our head is protected from direct contact with the ground, so we minimize head injuries. (Sorry about the road rash… there’s not much we can do about that!)
Training - Sport Imagery Training
While the crashing technique is pretty straightforward, how can we possibly remember to do it in the heat of the moment… in the split second when we are actually crashing? How do we practice crashing, or reacting properly in other emergencies?
Humans are very good at learning by simulating an experience in our minds. Popularly called “guided visualization”, a better term is “Sport Imagery Training”. We want to imagine with all our senses from a first-person perspective… sight, sound, balance, body movement, touch, our emotions. We are going to train ourselves by repeatedly simulating a specific sport situation. We “play a movie” for our brains to “trick” our brains into thinking the experience is real. It’s useful to add in some physical movements that coincide with the visualized images. For example, you can put your arms in the position you use to hold your handle bars and tighten your fists, as if holding the bars tightly.
You can do this anytime… in the shower, or brushing you teeth, or working in the yard… anytime you are alone and can concentrate for a minute. But you want to practice frequently… daily.
For example…. “It’s a bright fall day. Smell the leaves and the fresh air from the recent rain. Hear the wind as you descend. You are on a left-hand curve on a downhill and hit a a patch of wet leaves. You feel your front wheel slide out as you lose control. Feel your balance shift. Feel the fear… your adrenaline is pumping, you know you’re about to crash, falling to your left. Hold you bars! Tuck in your knee and elbow! Keep you head up and to the right! Ouch! That hurt as you hit! But your hands are on the bars, you kept you head from making contact, and you hit the ground with most of the side of your arm and most of you leg”. You slide to a stop, and get up unhurt, congratulating yourself on your ability to crash safely.
It’s good to practice different scenarios. And it’s a very useful technique for practicing other emergency situations… A car turns in front of you cutting you off. A dog runs in front of you. A rider in front of you brakes without warning. Simulate those emergencies, and you will train you brain to automatically do the right thing if the emergency occurs in real life.
As I discovered on the velodrome, sport imagery training really works! That’s why it’s practiced by many elite athletes. For example, the Canadian Olympic medallist bobsledder Lyndon Rush has this to say:
“I try to keep the track in my mind throughout the year. I’ll be in the shower or brushing my teeth. It just takes a minute, so I do the whole thing or sometimes just the corners that are more technical. You try to keep it fresh in your head, so when you do get there, you are not just starting at square one. It’s amazing how much you can do in your mind.”
Here are some links with more information on the technique: